BACK to Guide Home CLOSE WINDOW
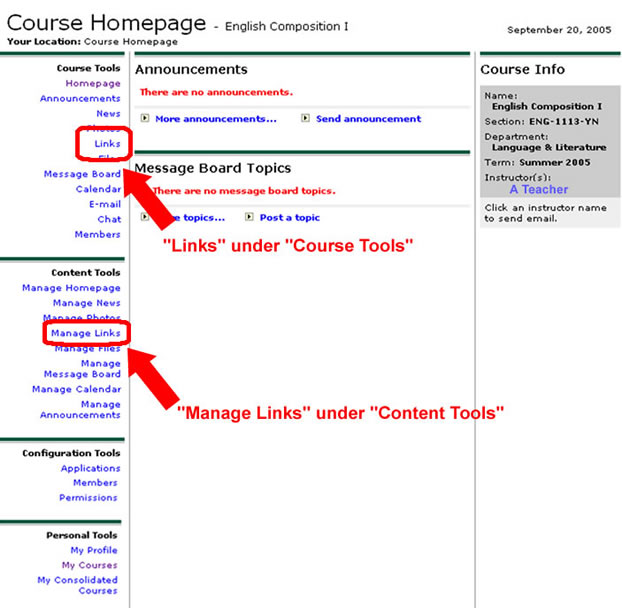
There are two ways to post links on the My Courses Home Page. The first is the same Links tool that would be used by anyone and is in the list under the Course Tools heading. The other is the Manage Links tool under the Content Tools heading (the section that only you can access). See the picture below:
Using "Links" under "Course Tools"
First, as you probably guessed, click on "Links" under "Course Tools."
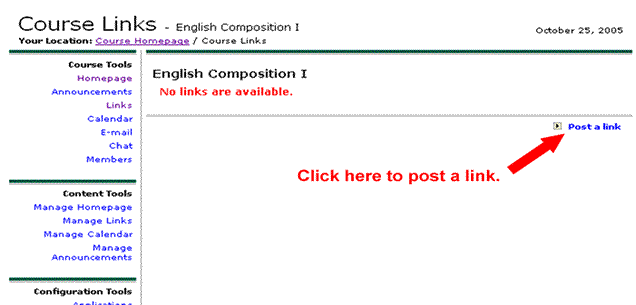
The next screen will display any links already posted or, as in the picture below where none have been posted, the clever notice in red that says "No Links are Available." Click on the blue link toward the right that says "Post a link."
The next screen displays the form to fill out for posting a link Follow the example below to fill in the required information, then click the "Post" button.

Click the "Post" button when you're done. A smaller box displays telling you the link has been posted. There is an "OK" button in this dialog box. Click on it to display the "Course Links" page. You should see something like this:
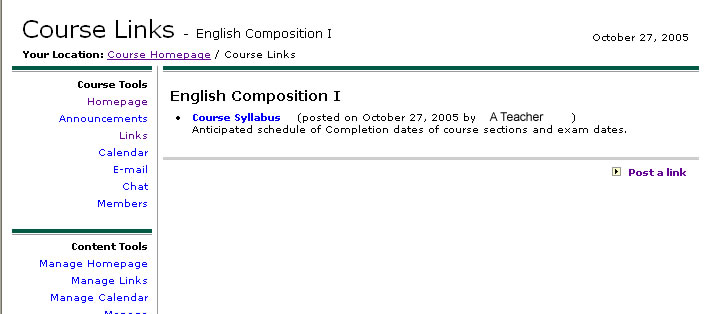
Be aware that this Course Links page only displays when someone clicks on "Links" under Course Tools.
In other words, when a student clicks the name of the course in the "My Courses" list, they will see the Course Home Page, which does NOT display links. They would then have to click on "Links" in the "Course Tools" to see a page like the picture above.
To Correct a Link - Use the "Manage Links" under the bold heading "Content Tools" to change an existing link:
* Click on the name of the link where it it is listed in the "Active Links" section.
* On the next screen, the link is displayed with three buttons located to the upper right. One button is labeled "Edit." Click on the Edit button.
* The screen changes to an editable display of the link wherein you can change any part of it. There is also now an "Update" button displayed to the upper right. After you've made any changes, click the "Update" button. The system displays a dialog box telling you the changes were applied. Click the "OK" button to acknowledge the message. Now click on "Links" under the bold "Course Tools" heading to display the changed link.
You can use the "Manage Homepage" tool under "Content Tools" to make the links display on the Course Home Page, but you must create the link(s) first.
Click HERE for the guide on displaying Links on the Course Homepage.
Using "Manage Links" under the Course Content Heading
There are a few differences between this method and the first, but the time requirement for each is about the same. This method does provide you with a little more control because, as the Instructor, you are the Group Leader.
First (of course) click on "Manage Links" beneath the "Content Tools" Header in the left Navigation Panel of the Course Homepage (See the first picture at the top of this page for reference).
You will see the "Manage Links" page:
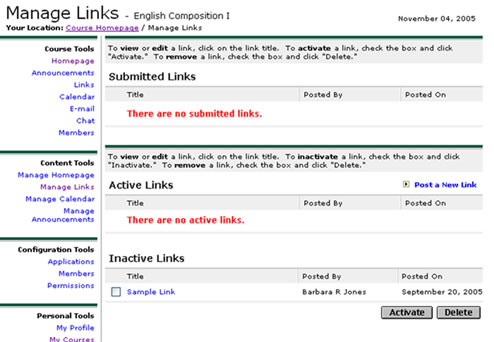
Note that the "Manage Links" page is divided into three sections - Submitted Links, Active Links and Inactive Links.
Submitted Links are those that have been posted by students. Having the Links tool enabled allows anyone to create a link using the Course Tools. However, a link that is created by a student is only submitted to this Manage Links utility and is NOT automatically posted, thereby preventing erroneous or malicious postings. If a link had been submitted, it would be listed in this section with an empty checkbox to the left of it. As the leader, you could click on the link to see whether it is desirable to make it available to the class, then click on the box to select it if you decide to post it. An "Activate" button would be displayed beneath the submitted link(s) which you would click on after selecting the link(s) to post.
Active Links are any links that are currently viewable in the Links section. As leader, you could create your links by coming to this section and clicking on the "Post a New Link" words to the right of the bold Active Links heading. You would then use the same link creation form as described in the first part of this guide to make one or more new links. Since you would be creating them in this Manage Links utility, they would automatically be posted.
Inactive Links are those links that you have decided to keep, but not remove. They can be activated by clicking the box to the left of the title, then clicking the "Activate" button. Active links can be de-activated by selecting the box to the left of any active links. There would be an "Inactivate" button displayed which you would click on to make the link inactive. It would then be listed in the Inactive Links section.
Notice that each section will also display a "Delete" button when there is one or more links in that section. Permanently remove a link by checking the box to the left of it, then clicking the "Delete" button.
BACK to Guide Home CLOSE WINDOW