Installing Office from Office 365
Click the
link under “Quick Launch/LAUNCHPAD” on the “Home” page that says “Office 365
Dashboard”.
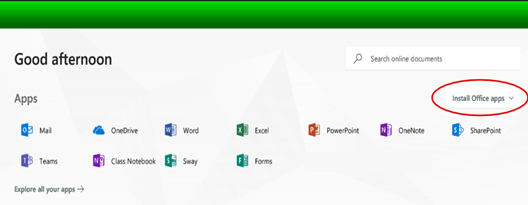
Click on the
“Install Office apps” button on the Office 365 Dashboard.
Select whether
to take the default install of the 32-bit version and the main apps, or select
additional options. If you select additional options, you’ll see the screen
below:
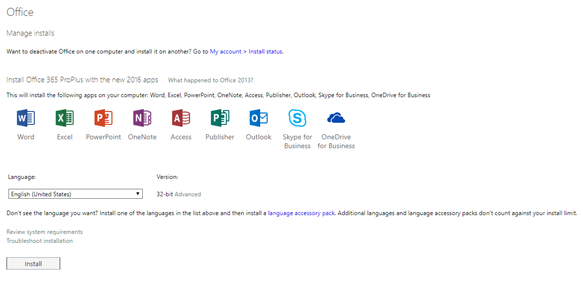
The list of
apps is complete with this option, and you can also change the Language option.
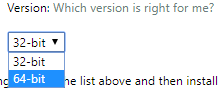
Click the word “Advanced” to get a droplist to select
the 32 or 64 bit version.
Then click
the Install button at the bottom left to begin the installation process.
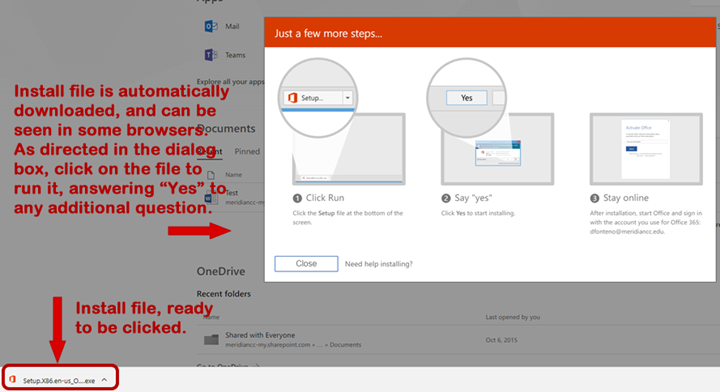
The install
file will be downloaded immediately, and a dialog box will open to guide you
through the process.
(NOTE TO MAC
USERS: Unlike the Windows installation, the Install file for Macs contains the
complete software package, so the portion of time spent for the Install takes
place during the download part of the operation. Once downloaded, it takes very
little time for the actual installation part of the process.)
During the
install process, the Dialog Box displays a progress bar indicating how much
time is left before completion.
Once the
installation completes, the Office Suite you just installed MUST be ACTIVATED
or it will not function. To do that, follow these steps:
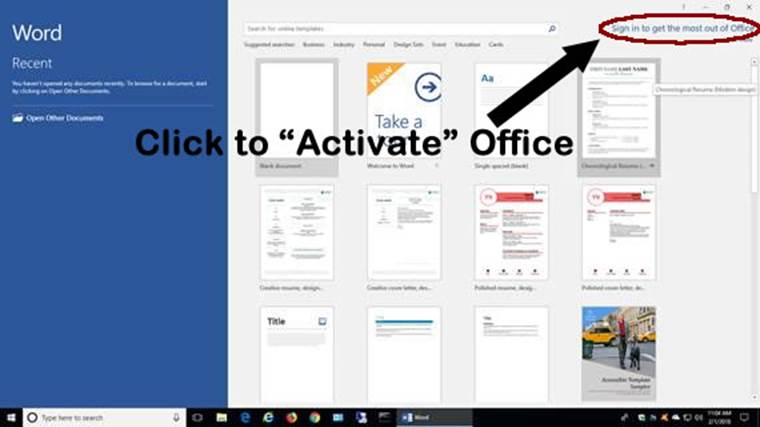
In the
Office Suite you just installed, find and open “Word”. Do NOT use one of the other apps for
Activation. Word is the app designed to carry out this function.
When you
open “Word” to the screen below (do not open to a blank file for
processing. If you do, click the “Home”
link at the upper left to get a page like the one pictured below),
there will
be a link to click on to “Activate” the Office App.
Click on it,
and you will get a form similar to the form below asking you to log in.
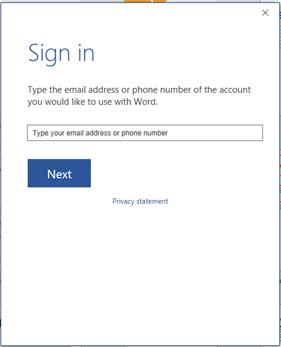
NOTE! – You
need to enter the EMAIL ADDRESS, not just your ID, AND you must use the MCC
email address that ends with “enet.meridiancc.edu”.
So if your
MCC ID is “astudent”, you would enter astudent@enet.meridiancc.edu in
the first blank. Click “Next” to get a
prompt for the Password. Enter the password you use to log into Eaglenet, which
is the same as the one you use to log into a computer on campus.
Click the
button to submit the information. The
system will churn a few seconds, then should display a notice that Office is
now activated.
There is no
need to do this with any of the other Office apps because this activation
process activates the WHOLE app suite, not just Word.
This
activation will remain in place as long as you are a REGISTERED student at MCC.
Typically,
this means you have to sit out a Fall or Spring term before you are removed
from the campus Student Network, which is when your Office activation will
expire.
This is why
it is not a good idea to use the email associated with your Office install for
Personal Communications.
If you like,
you can follow the directions available within Eaglenet to forward all your
Office 365 email to a preferred email address of your choice. That way you
don’t have to be concerned with losing touch with your Personal contacts once
you have left MCC.
Once your
MCC account is removed, you’ll cease receiving any auto-forwarding from your
Office 365 email, and your personal contacts will still be communicating with
you through your personal email account.