Set Up Auto-Forwarding in Office 365
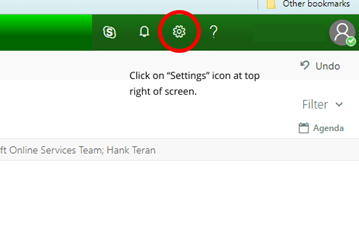
1. In Office 365 Outlook, click on the “Settings” icon at the upper right as pictured here:
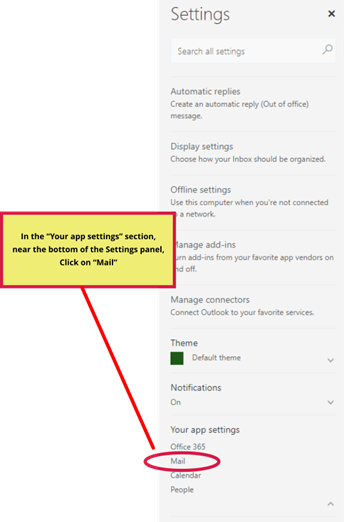
2. The settings panel opens. Click on “Mail” in the “Your app settings” section.
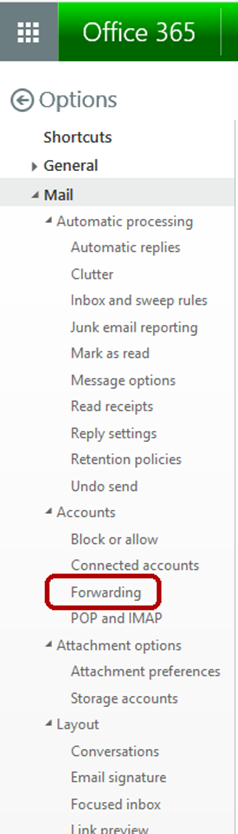
3. The Options panel opens on the far LEFT of the screen. The Mail settings section is already opened.
Look down the list for “Accounts”, and underneath that the word “Forwarding”. Click on “Forwarding”.
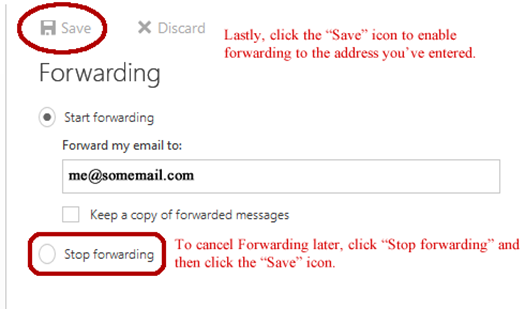
4. The “Forwarding” setup is displayed to the right of the Options panel. Click on the “Start forwarding” option
to begin the setup.

5. Once “Start forwarding” is selected the box for the email address becomes available for you to enter
the address where you want to send forwarded messages. Type in the address as pictured here.
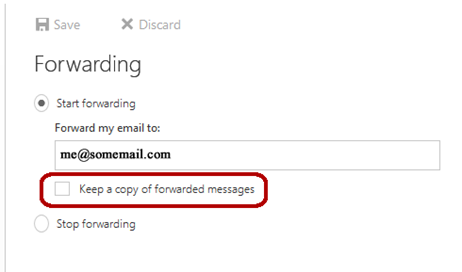
If
you want to keep a copy of Forwarded messages in THIS email, click the “Keep a
copy
of forwarded messages” option.
6. Finally, click the “Save” icon above the setup panel.
Note that if you decide to stop the forwarding process, just come back to this setup and click the “Stop forwarding” option and click the “Save” icon again.
Please
note that these steps only apply to Auto Forwarding from the Office 365 email.
Whatever email service
you’re
forwarding to may have requirements for receiving forwarded email messages. Consult the “Help”
resource
of that service.